Replacing Old Bathroom Sink Countertops: DIY or Hire a Professional?
05/28/2024
7 min read
7 min read
Replacing a bathroom countertop or vanity top is a quick and easy way to upgrade your bathroom’s look and feel. Bathroom sink countertops can become outdated, accumulate grime and bacteria, and even deteriorate after years of use. With this, investing in new surfaces can make a big difference in transforming your space and, best of all, enhancing your daily routine.
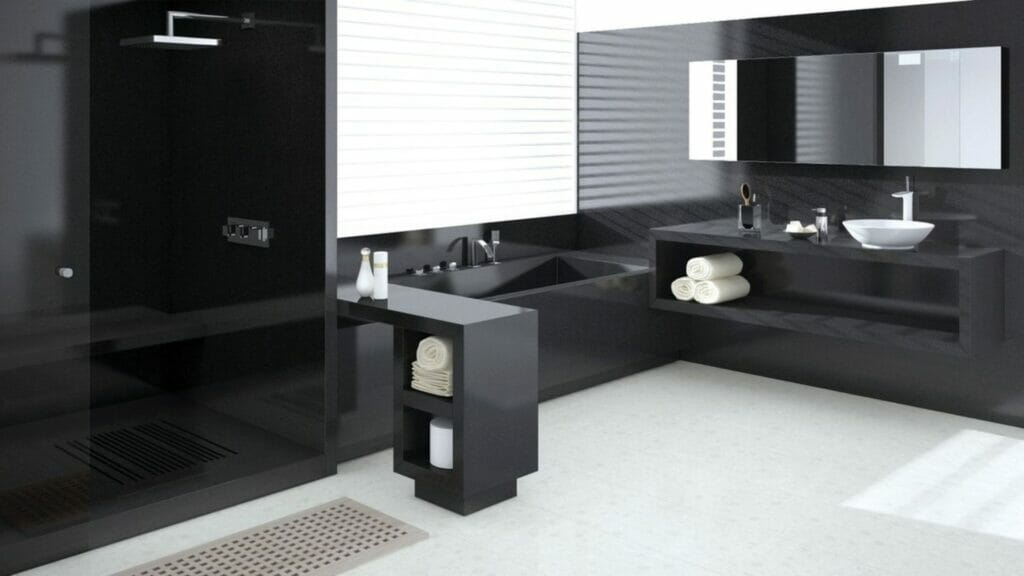
If you’re looking for the best material for your new bathroom countertop, Caesarstone’s quartz countertops are worth considering. Their superior quality and long-lasting durability make them a reliable choice for any bathroom remodel. Best of all, they come in various breathtaking designs, allowing you to effortlessly add a fresh and stylish element to your space that will stand the test of time.
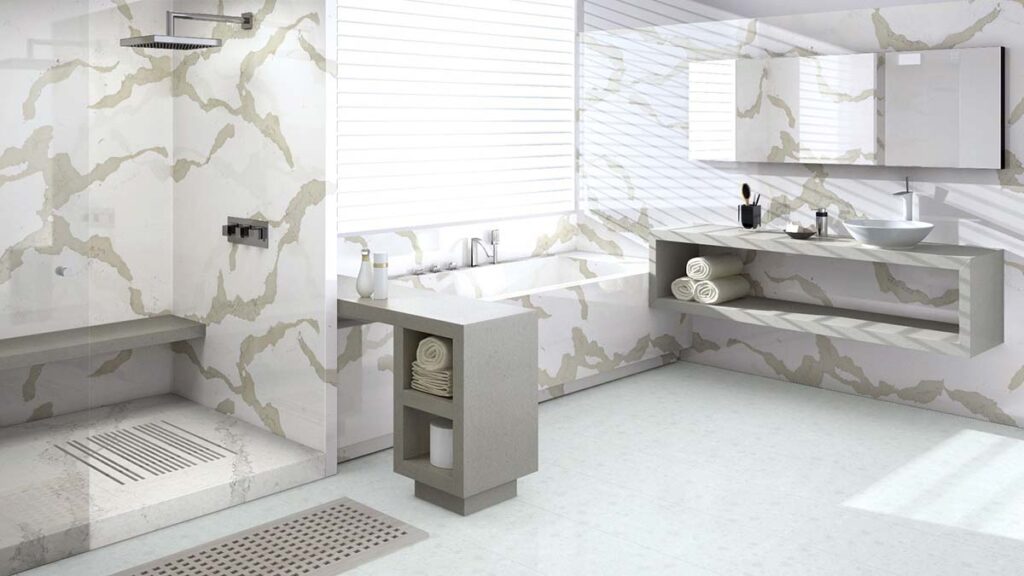
For instance, the 5114 Calacatta Maximus blends modern design and natural beauty to make outdated bathrooms stylish and functional. Its sleek surface features natural lines weaving across a soft-toned base that can add a touch of elegance to your space and bring it into the present.
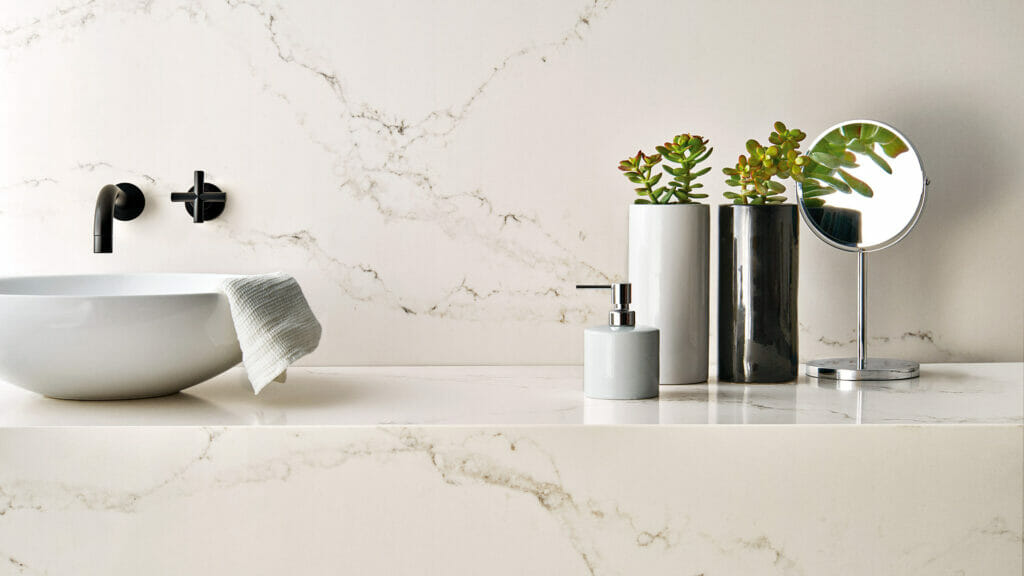
On the other hand, a countertop color like 5141 Frosty Carrina is a better fit if you’re aiming for a timeless, classic look. Its ivory base and powder grey veining give it a more traditional feel, which can enhance your bathroom’s overall aesthetic.
If you’re considering replacing a bathroom countertop yourself, the step-by-step guide below can be helpful. However, remember that the installation process can be tricky, and mistakes can lead to costly repairs. It’s always recommended to hire a professional to ensure a smooth installation and avoid any issues.
It’s best to have the right tools on hand before you begin the actual work. You don’t want to find yourself midway through the process only to learn you’re short of a critical tool.
Generally, you’ll need tools like a pipe wrench and an adjustable wrench to turn the water and plumbing systems underneath your sink on and off. It’s also crucial to measure your old countertop to ensure the new one is the right size, so it helps to have a measuring tape handy.
Depending on the attachment mechanism of your old countertop and the requirements of the new one, you may need a variety of hand tools, such as screwdrivers or specialty tools. The following may be required to detach the old countertop and secure the new one in place:
Then, ensure your new countertop has all its necessary components, such as the bowl. It’s worth noting that some countertops come with a built-in sink bowl, while others only have an opening where the fixture can be installed.
Checking all the tools and components you need thoroughly can help you avoid any delays or unexpected surprises during your countertop replacement project.
Prepare your work area well to ensure safety and efficiency as you work. Begin by removing any unnecessary clutter or objects that could be damaged during the process. Then, place a drop cloth or towel around your countertop’s base to prevent any mess.
You also want to organize your tools in an easily accessible spot and ensure all components needed for the installation are assembled and ready. These keep your work process smooth and efficient.
Finally, shut off the water supply for the bathroom where the installation will take place. The drain pipes and supply lines underneath your countertop must also be disconnected from the sink to help prevent accidental leaks.
Once your plumbing is disconnected and your sink is detached from your current countertop, the latter can be removed. If the sink is held in place by clips underneath, loosen and remove them. You may also need to cut the sealant around the sink’s edge to be able to remove it.
Once the sink is out, look for screws or brackets securing the countertop to the cabinets. Remove these fasteners with your screwdriver or drill. However, a chisel and mallet may be required if your old countertop is secured to the base using adhesive. Whichever technique you use, practice extreme caution to avoid unnecessary damage to the countertop base and the cabinets below.
Before you can even think about the design possibilities your new countertop brings, it’s crucial to ensure your countertop base or base cabinets are level. A level base unifies the foundation and prevents future issues, such as cracking or instability in your replacement countertop.
Use a long level to check the top of the cabinets in multiple directions. If the cabinets are not level, shims or spacers can be used to adjust the height until even.
Place your new countertop onto the level base to check for fit and ensure proper alignment with the sink opening. If everything aligns correctly, use the hardware included with your countertop to secure it to the base. Your sink bowl, if necessary, can also be installed at this point.
Next, install your faucet into the pre-drilled holes and connect it to the appropriate plumbing components. Attach the hot and cold water supply lines to the corresponding valves. Wrap up by fixing the faucet in place according to the manufacturer’s instructions.
Once done, seal the area where your faucet joins the new countertop by applying caulk. If your sink bowl was installed with the new countertop, you also want to caulk its edges and the parts of the countertop surrounding it to keep any water or moisture from seeping in.
Caulking your new countertop’s components is crucial in preventing water from reaching and damaging them. Taking the time to do this correctly helps you avoid costly repairs or replacements down the line and ensures the longevity of your bathroom countertop.
Complete your bathroom renovation project by turning the water back on to ensure everything functions correctly and there are no leaks or damages.
Afterward, clean up any debris, dust, and grime that may have accumulated during the renovation. Put away all the tools that were used and store or discard any remaining materials. Finally, remove excess caulk or adhesive and wipe down your new countertop.
Deciding whether to replace a bathroom countertop on your own or hire a professional takes serious consideration. On the one hand, a DIY project could save money and provide a sense of accomplishment.
However, a professional ensures a correct installation and expert finishing. Investing in a quality countertop for your bathroom is a great idea, but it’s equally essential to ensure everything is installed correctly and the plumbing components are functioning how they should. With professionals fitting your new countertop, you can be confident your investment isn’t going to waste.
By investing in quality countertops and seeking assistance from professionals, you’re on your way to turning your sink countertop vision into a beautiful reality.
{{ subtitle }}
{{ i.desc }}
{{ subtitle }}
{{ subtitle }}